Booking Limit Manager settings and instructions
The Booking Limit Manager offers comprehensive oversight of your booking system. This documentation is designed to assist you in understanding the features, available options, and recommended practices for the optimal use of this tool.
Booking Limit Manager per location
The Location Booking Limit Manager allows you to set specific booking limits for each location in your organization, providing detailed control over appointments and improving the overall customer experience. Below is a thorough overview of how the Location Booking Limit Manager works.
Setting Location Booking Limits
1. Accessing Your Locations:
- Begin by navigating to the e-Janji dashboard.
- Select the Locations option located on the left side of the e-Janji interface.
2. Choosing a Location:
- A list of all established business locations will appear.
- Identify and select the specific location for which you wish to establish booking limits.
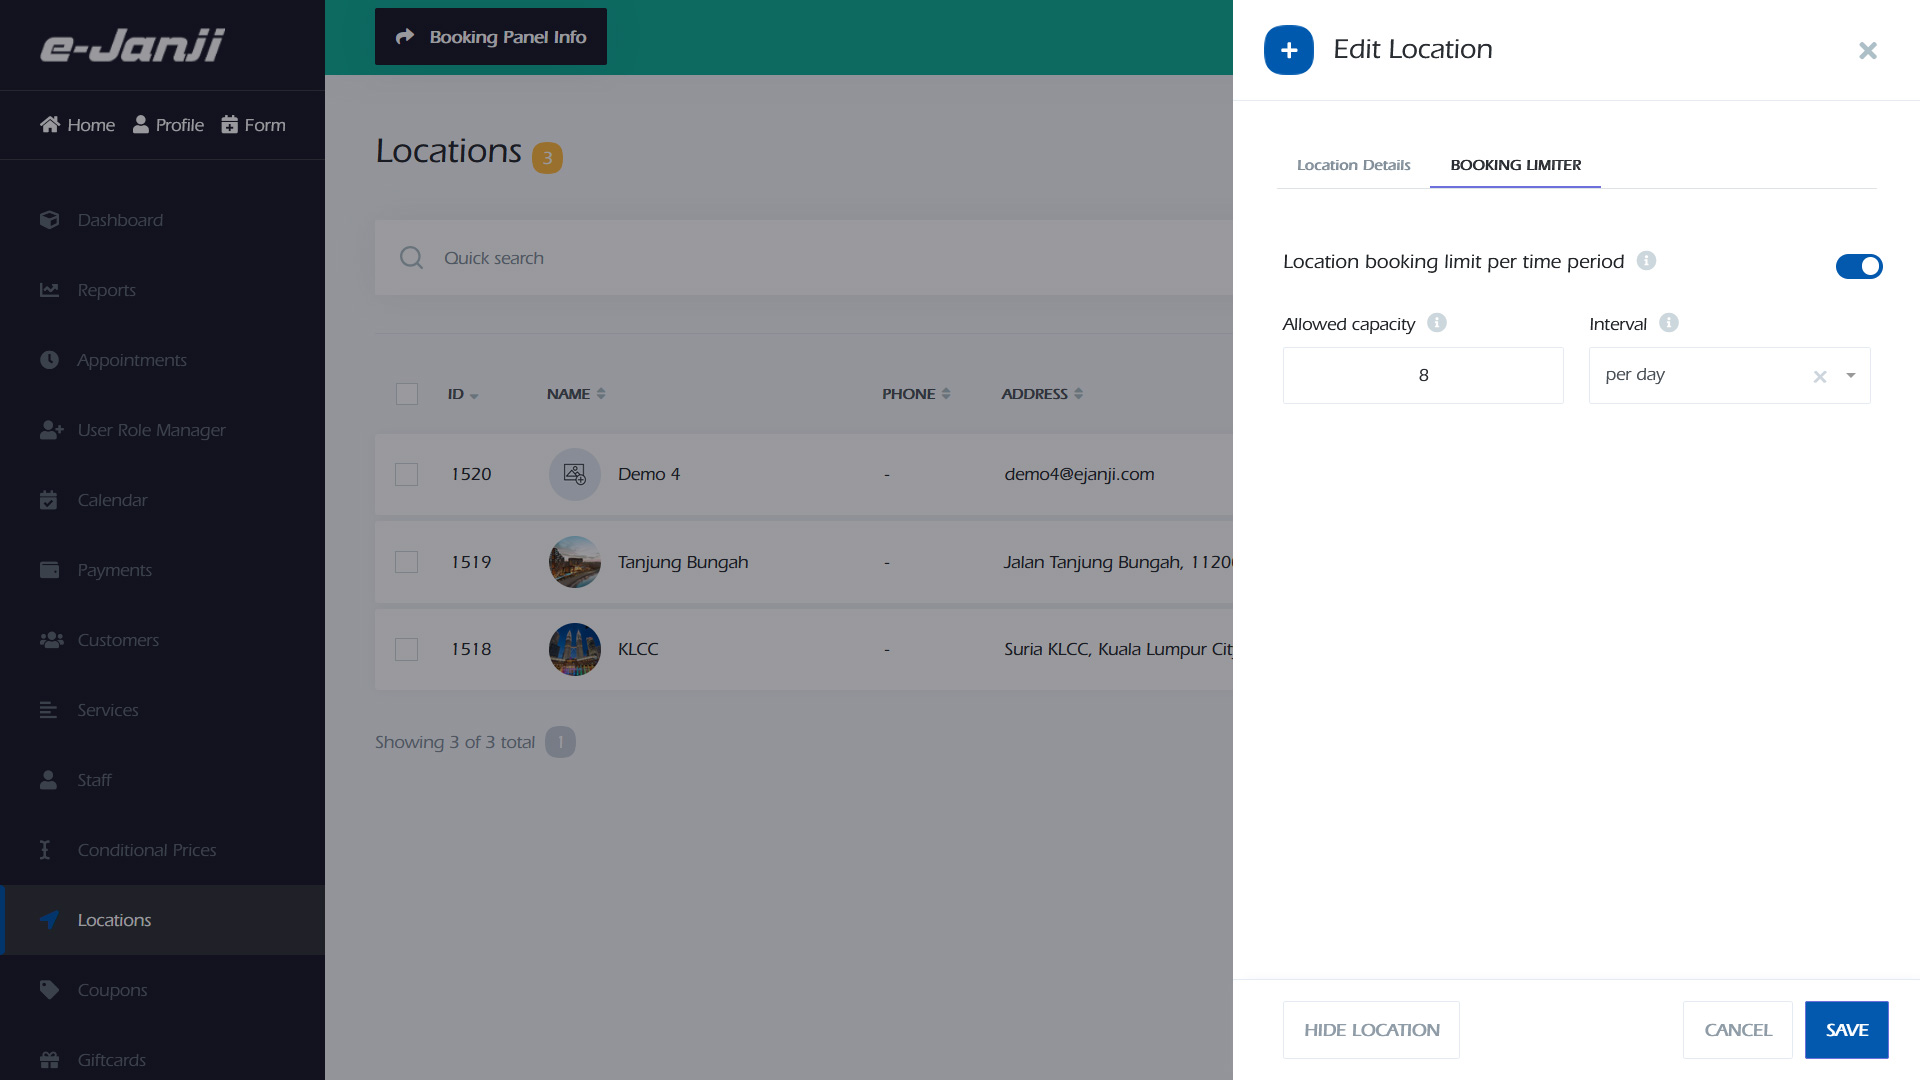
3. Setting Booking Limits:
- After selecting a location, click on the three dots adjacent to that location, then choose the edit option.
- Proceed to the “BOOKING LIMITER” tab. Here, you can define the maximum number of bookings permitted for that location within a specified time period (such as daily or weekly), along with the capacity limit.
- Once you have configured the limits, ensure to save your settings to implement the changes.
How does it work?
Reducing Overcrowding:
- The Location Booking Limit Manager tackles overcrowding at each business location by setting a maximum number of appointments permitted within a specific time period.
Improving Service Quality:
- By implementing location-specific limits, you ensure that operations stay within capacity, which improves service quality and facilitates a seamless flow of appointments.
Booking Limit Manager per staff
The staff-specific booking limit feature of the Booking Limit Manager enables you to tailor booking limits for each staff member, fostering a balanced and efficient work environment. Below is a comprehensive guide on how to effectively use the Staff Booking Limit Manager and its various functionalities.
Setting Staff-Specific Booking Limits
1. Accessing Your Staff:
- Begin by navigating to the e-Janji dashboard.
- Select the “Staff” option located on the left side of the e-Janji interface.
2. Choosing a Staff Member:
- A list of all staff members will appear.
- Identify and select the specific staff member for whom you wish to establish booking limits.
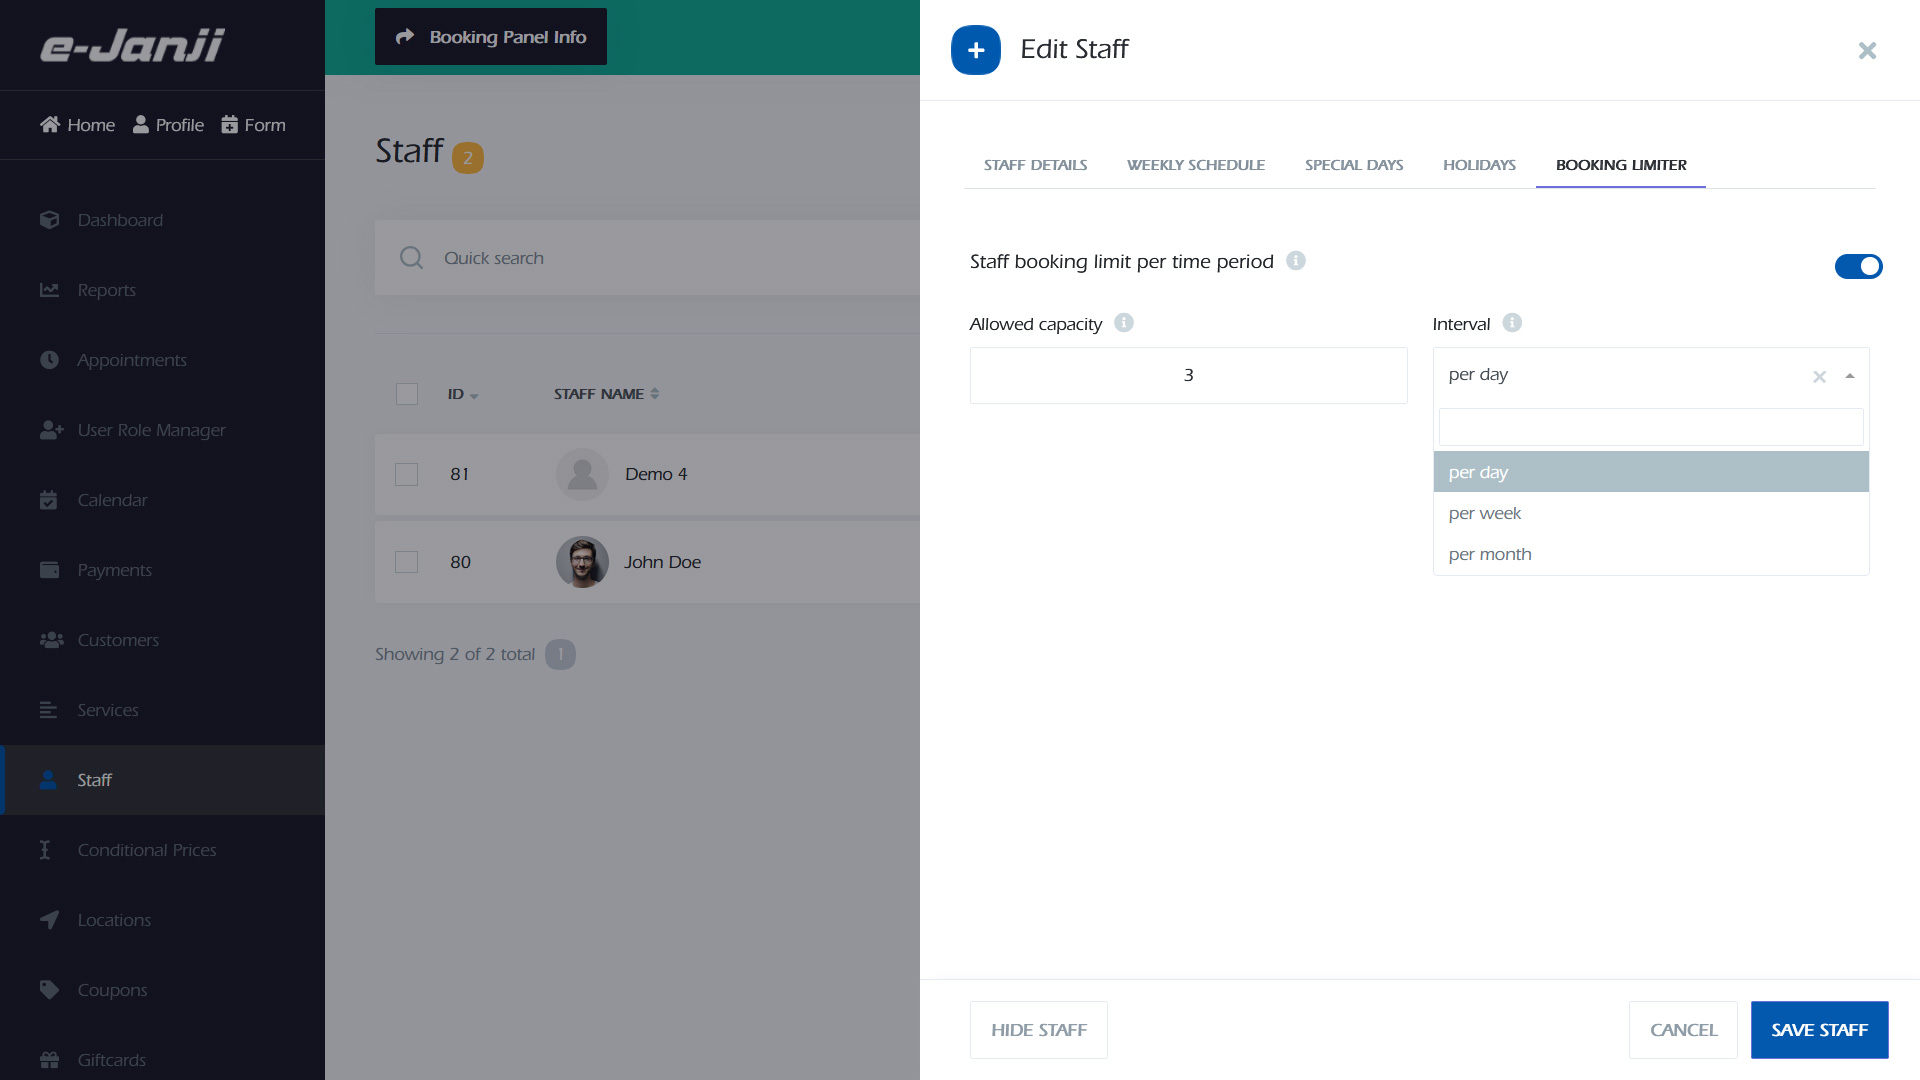
3. Setting Booking Limits:
- After selecting the desired staff member, click on the three dots adjacent to their name, then choose the edit option.
- Proceed to the “BOOKING LIMITER” tab. Here, you can define the maximum number of bookings permitted for that staff member within a specified time period (such as daily or weekly), along with the capacity limit.
- Once you have configured the limits, ensure to save your settings to implement the changes.
How does it work?
Promoting Team Empowerment:
- The Staff Booking Limit Manager enables every team member to manage their workload effectively by setting personalized booking limits.
Cultivating a Balanced Work Environment:
- Establish a cohesive and productive workplace by customizing limits for each staff member based on their skills and availability.
Enhancing Team Efficiency:
- Help your team focus on delivering outstanding services by preventing overbooking and minimizing the chances of burnout.
Booking Limit Manager per service
The Service feature of the Booking Limit Manager enables you to establish particular booking limits for each service, providing a versatile and strategic method for overseeing your appointments. Below is a comprehensive guide on how to efficiently make use of the Service Booking Limit Manager.
Setting Service-Specific Booking Limits
1. Accessing Your Services:
- Begin by navigating to the e-Janji dashboard.
- Select the Services option located on the left side of the e-Janji interface.
2. Choosing a Service:
- A list of all available services will appear.
- Identify and select the specific service for which you wish to establish booking limits.
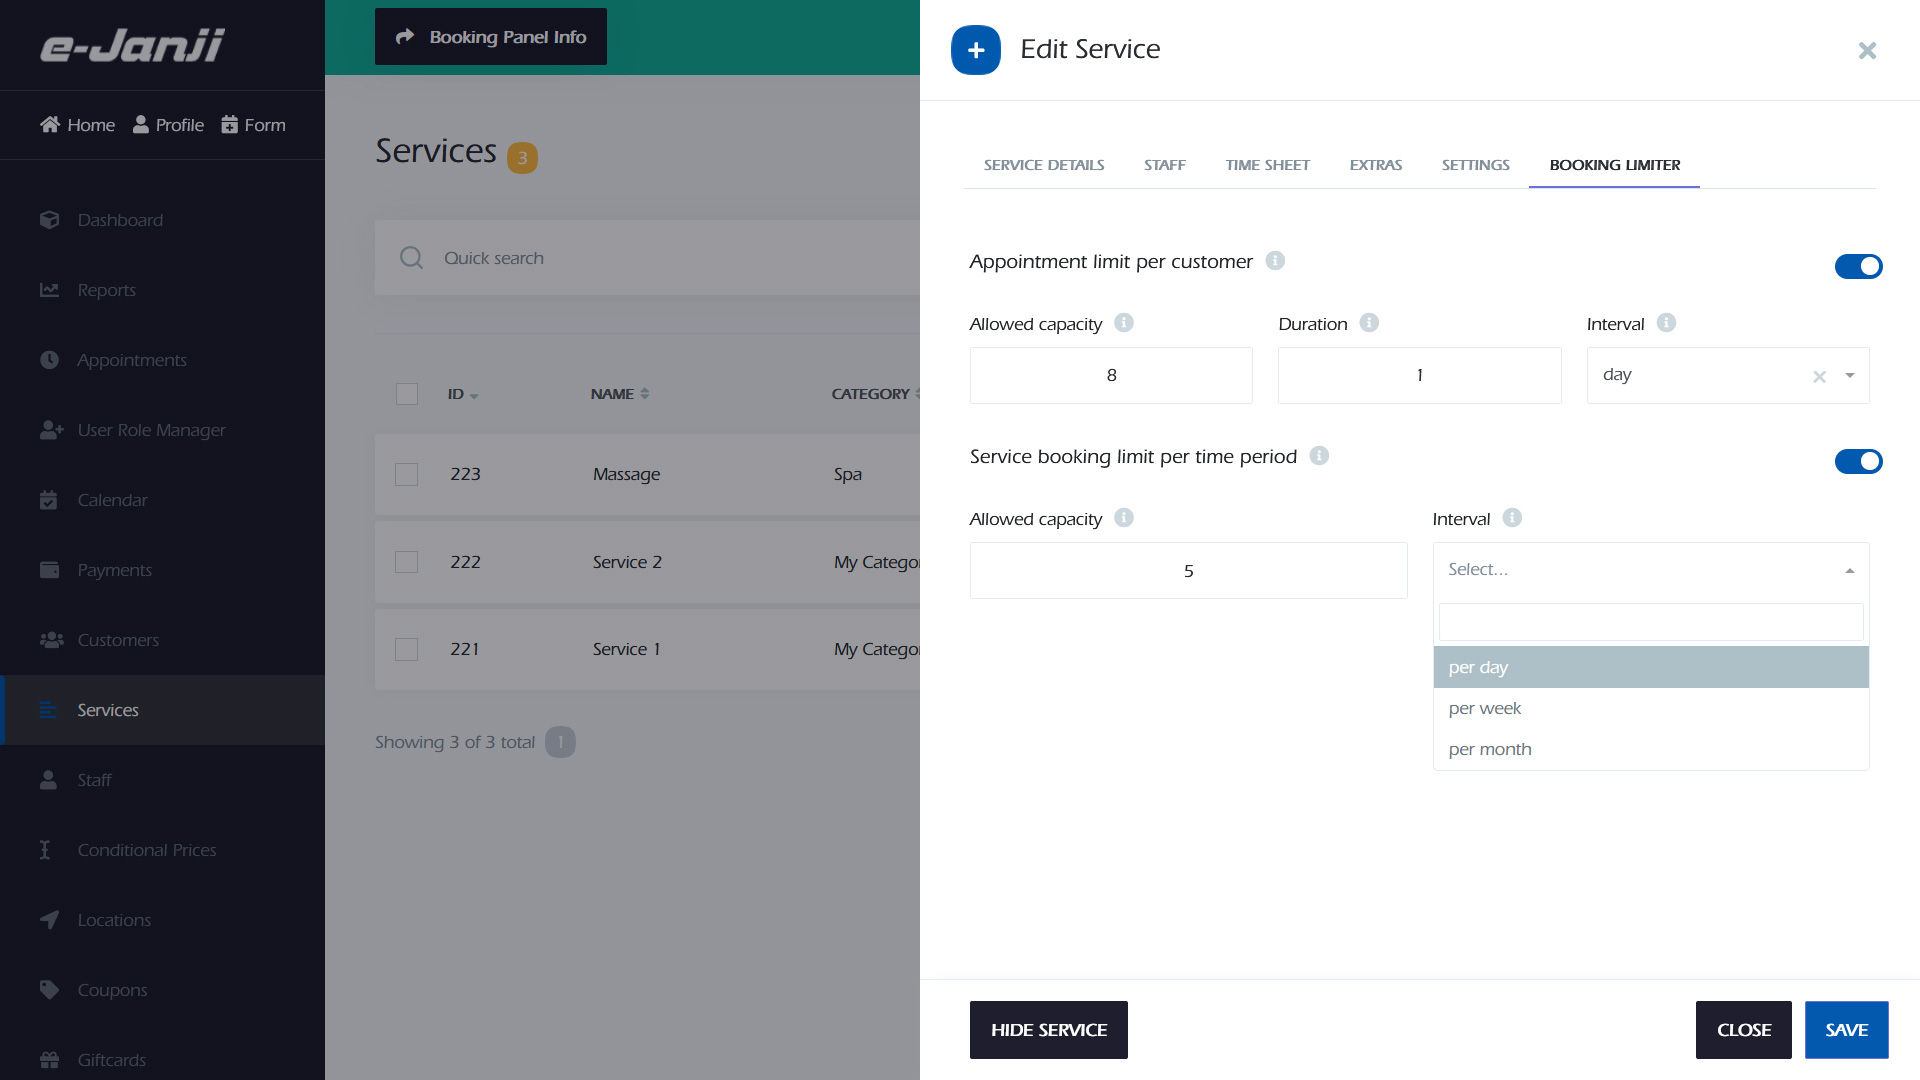
3. Setting Booking Limits:
- If you are utilizing the List view, after selecting a service, click on the three dots adjacent to that service and then select Edit. Conversely, if you are in Graphic View, click on the pencil icon next to the service to make edits.
- Proceed to the “BOOKING LIMITER” tab. Here, you can define the maximum number of bookings permitted for that service within a specified time period (such as daily or weekly), as well as the overall capacity limit. Additionally, you may impose a restriction for each customer regarding that service; for instance, if you set a capacity of 1 per customer per hour, each customer will only be able to book one instance of that service per hour.
- Once you have configured the limits, ensure to save your settings to implement the changes.
How does it work?
Enhancing Service Utilization:
- The Service Booking Limit Manager enables you to enhance the utilization of your services by establishing parameters that consider both demand and resource availability.
Customized Booking Approaches:
- Refine your scheduling approach by personalizing limits for services with high demand, thereby ensuring the efficient allocation of resources.
Mitigating Overbooking:
- Prevent overbooking of particular services, alleviating pressure on your staff and upholding a superior standard of service quality.
Booking Limit Manager per customer
The Customer feature of the Booking Limit Manager enables the establishment of universal booking limits for clients, promoting fairness and equitable access to appointments. Below is a comprehensive guide on how to efficiently make use of the Customer Booking Limit Manager.
Setting Global Customer Booking Limits
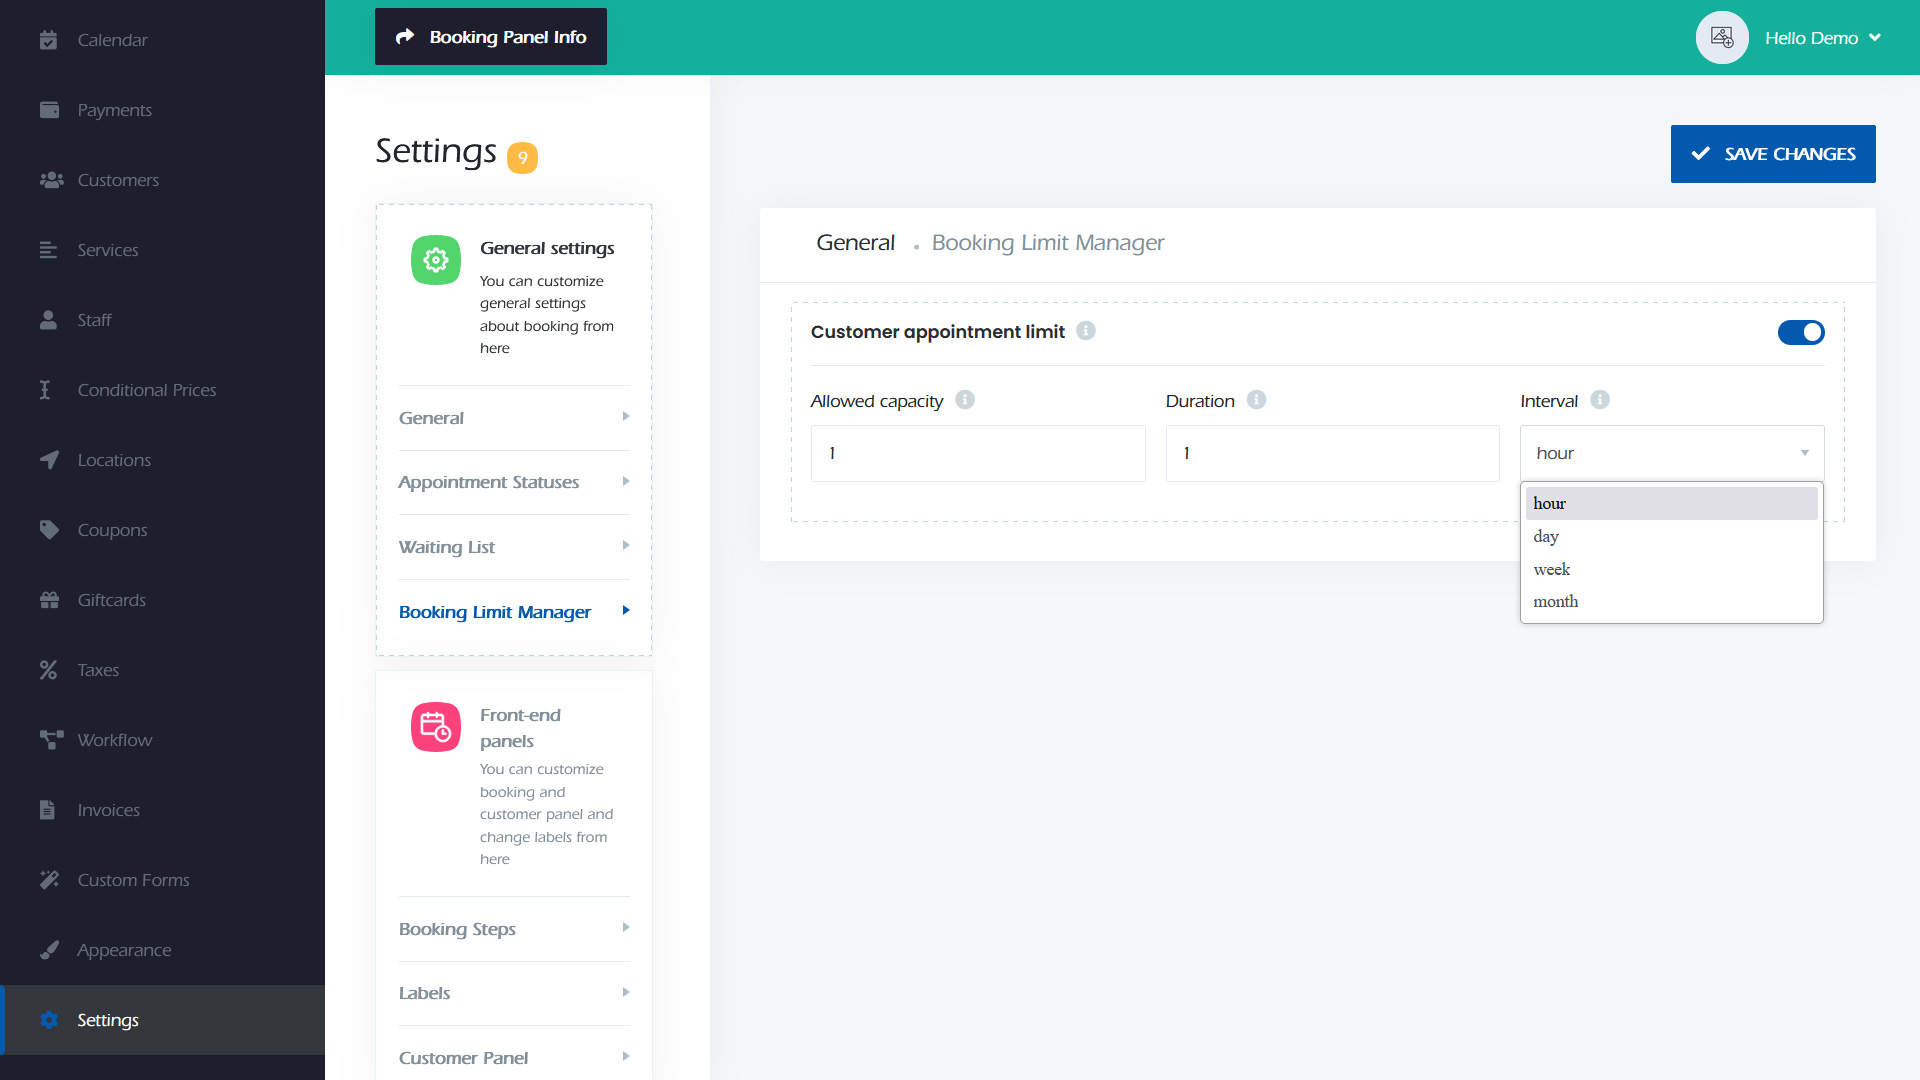
1. Accessing the Settings:
- Begin by opening the e-Janji dashboard. Proceed to the Settings section located on the left side of the interface. From there, select General Settings, followed by Booking Limit Manager.
2. Configuring Booking Limits:
- Within the settings, determine the maximum number of bookings permitted for each customer within a specified time period (for instance, daily or weekly). Once you have established the limits, ensure to save your settings to implement the changes.
How does it work?
Promoting Equity:
- The Customer Booking Limit Manager emphasizes equity and equal opportunity by establishing universal limits, thereby avoiding congestion within the booking system.
Enhancing Client Satisfaction:
- Improve customer contentment by facilitating a just and accessible booking procedure for every client.
Avoiding Overbooking:
- Implement comprehensive customer limits to avert overbooking of time slots, ensuring that each client has the chance to obtain their desired appointments.