Appointments
The Appointments menu provides a comprehensive list of all scheduled appointments. Additionally, users can effortlessly locate a specific appointment by utilizing the user-friendly search tool and various filters. Furthermore, the list can be sorted in ascending or descending order using the ASC and DESC markup options for all columns.
To modify or remove a scheduled appointment, simply access the options provided in front of the appointment and proceed to select either the Edit or Delete button. Additionally, if you wish to delete multiple appointments simultaneously, you can accomplish this by selecting the desired appointments and utilizing the delete button located at the bottom of the interface.
Furthermore, by selecting the icon located within the PAYMENT column, users will be able to access comprehensive Payment Information. It is possible to modify the Payment Price or adjust the Payment status according to individual requirements.
To initiate the creation of a fresh Appointment, simply click on the designated button labeled “NEW APPOINTMENT” located within the Appointments menu.
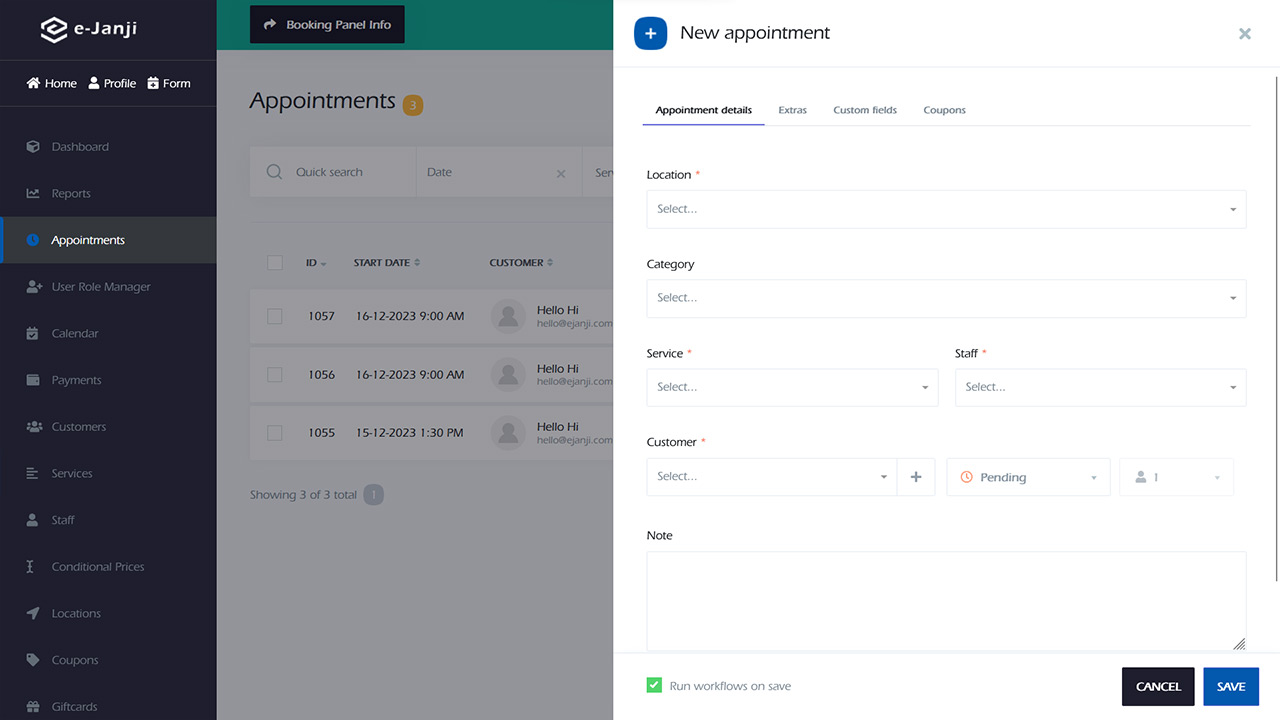
In the New Appointment window, choose the appropriate options pertaining to the Appointment. The Date and time options are provided based on the Timesheet, holidays, and special days. If Sunday is designated as a holiday in the settings, no time slot will be available for that particular day.
If a client has already scheduled an appointment for a specific timeslot, it will not be possible to schedule another appointment during that same period. However, if you want to allow multiple individuals to book a service for the same timeslot, you should set the Service capacity as “Group“. This will enable you to add additional clients to the appointment. Furthermore, if the service capacity is set as Group, other customers will also have the option to book the same timeslot on the booking page.
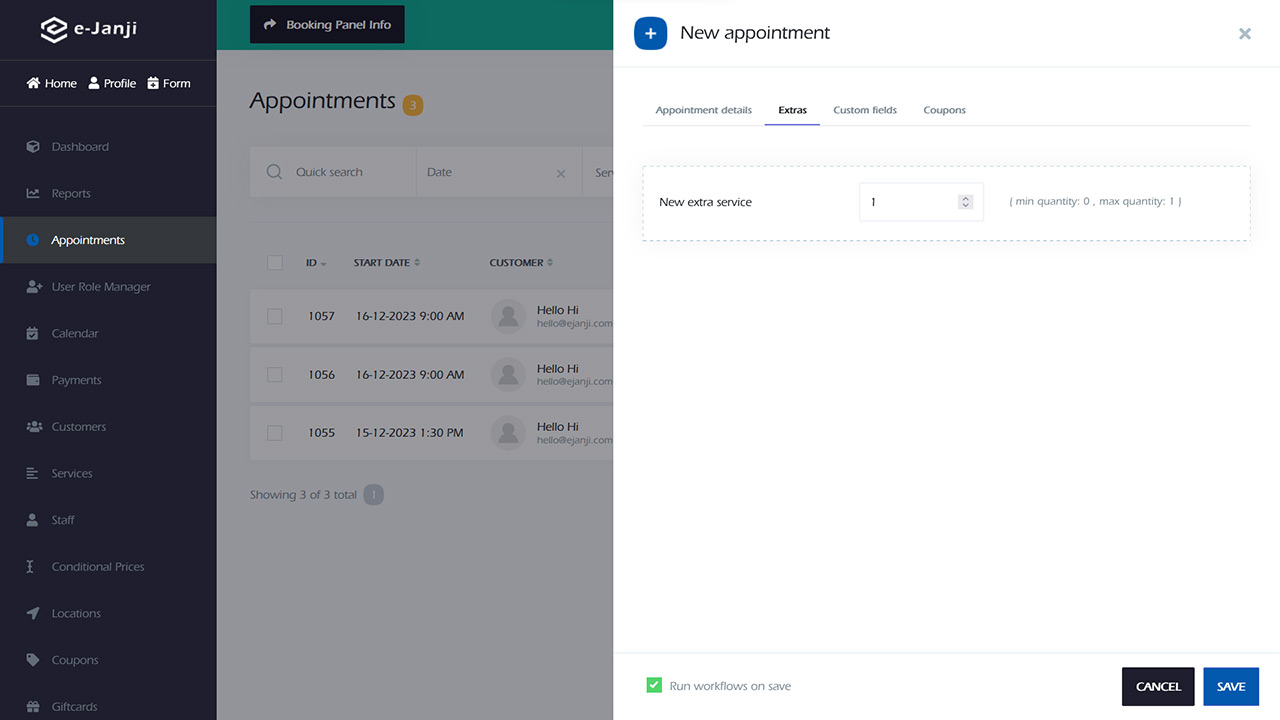
When customers are added to a group appointment through the admin panel, the option to select the number of customers is available. The chosen number of slots will then be subtracted from the service capacity. If there are any additional services related to the main service, they can be selected from the Extras tab.
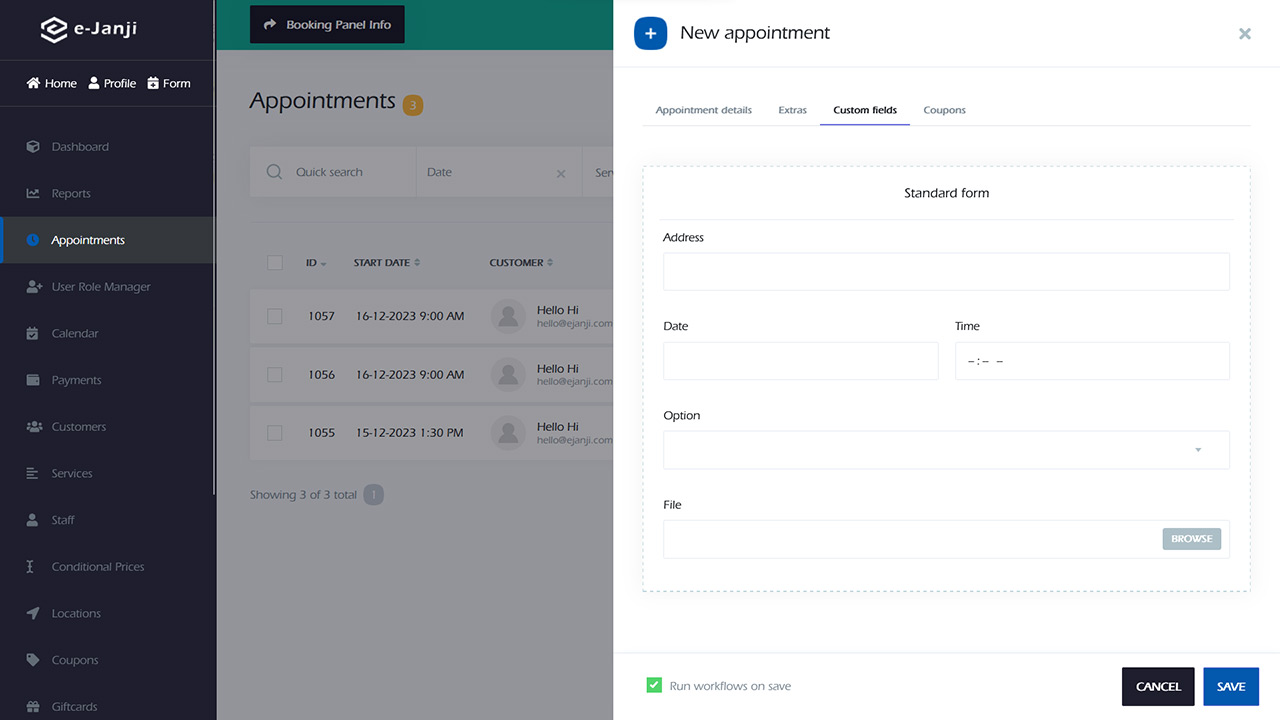
In case you require including supplementary details to your scheduled meeting, you can utilize the Custom Forms functionality during the process of creating a manual appointment.
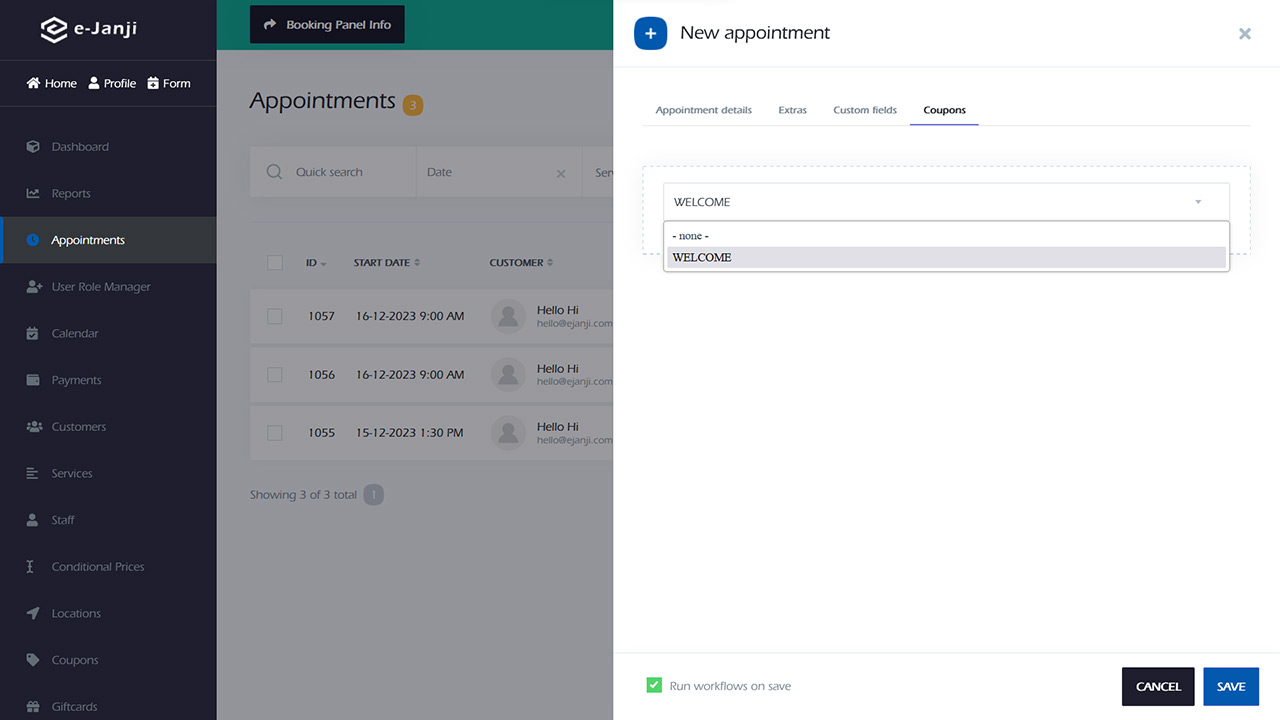
Coupons have the additional functionality of being included in the appointment when manually scheduling it through the administrative panel.
If the “Run workflows on save” option is not enabled, customers will not receive any notifications when manual changes are made to the Appointment. To ensure that notifications are sent, it is crucial to activate the checkbox.
After finalizing the date and time, proceed to pick a customer from the provided choices.
Monthly recurring appointments:
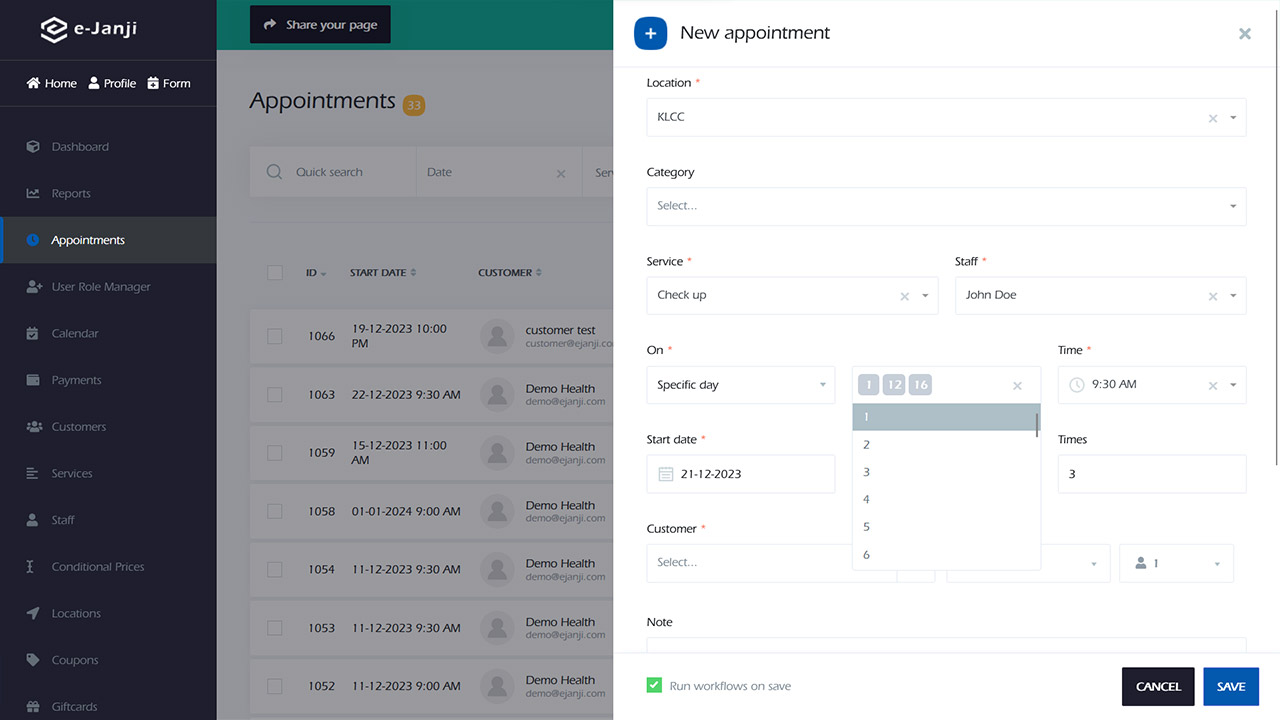
If you have a recurring Service that takes place on specific days of the month, you have the option to choose the Monthly plan. This allows customers to choose either specific days of the month or specific days of the week, such as the first Sunday, the last Wednesday, or the third Friday of each month.
By choosing the Specific day option, you have the ability to designate particular days ranging from 1 to 31. For instance, if you desire to have the Appointment recur on the 5th, 10th, and 15th of every month, you would opt for the 5, 10, and 15 choices. Additionally, you must indicate the start and end dates.
After filling in the necessary information, the number of repetitions for your Appointment based on your preferences will be displayed in the Times input. If you prefer not to determine the end date and wish to repeat the Appointment ten times, simply enter the number 10 in the Times section. By doing so, the system will automatically calculate the End date for you.
By choosing any of the options labeled as First, Second, Third, Fourth, or Last, you gain the flexibility to select any day of the week. For instance, you have the freedom to choose the First Monday, indicating that the Appointment will recur on the first Monday of every month.
Setting the Fixed full period during service creation renders the End date unmodifiable. The End date is automatically computed based on the service settings upon selection of the start date.
Weekly recurring appointments:
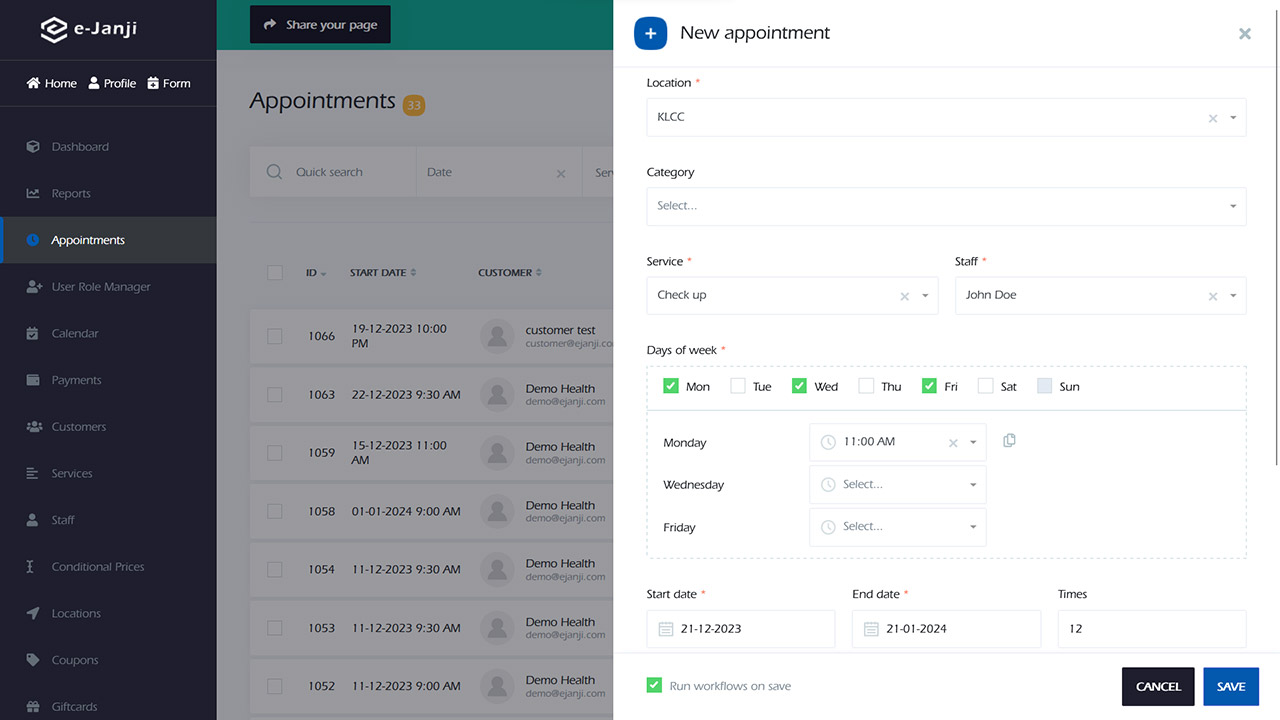
In this scenario, you have the option to select the specific days of the week that you desire. Once you have made your selection, you can then assign a start time for each chosen day. Lastly, you will need to choose the Start and End dates that correspond with your Appointment.
Daily recurring appointments:
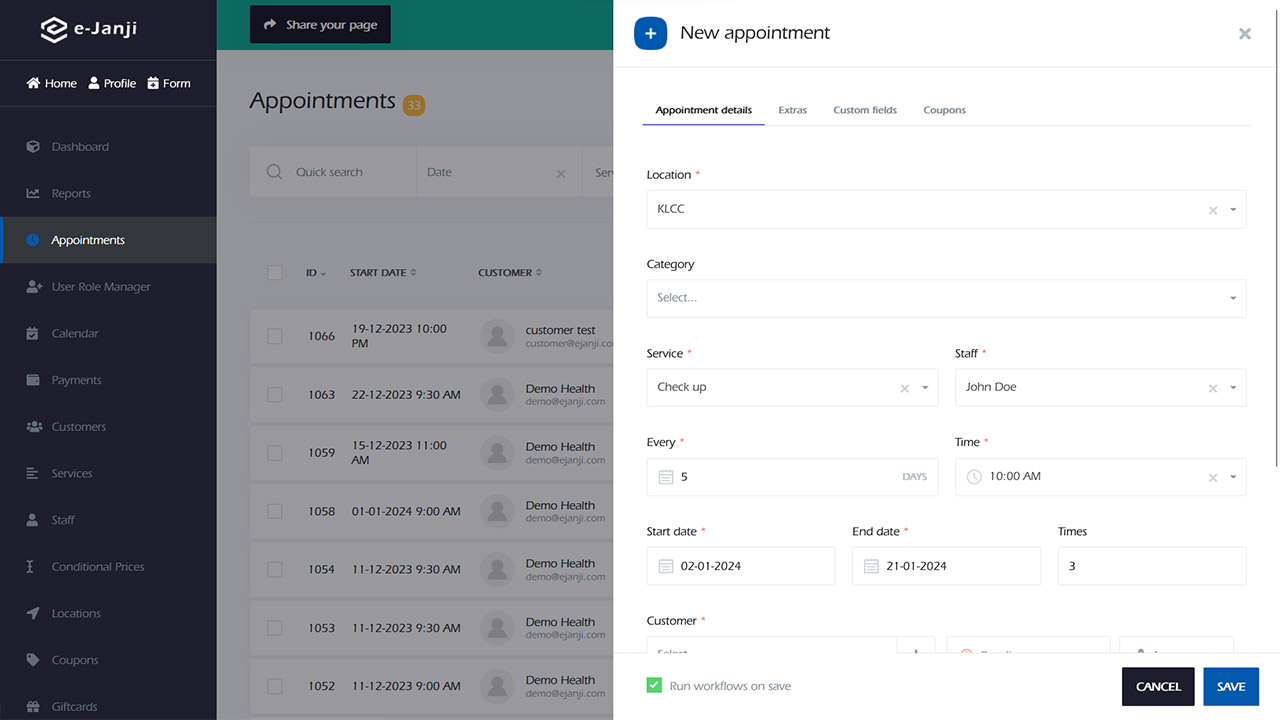
To initiate a daily recurring appointment, the initial step involves determining the frequency of repetition. By selecting the option of every 1 day, the appointment will be repeated on a daily basis. Conversely, opting for every 2 days will result in the appointment being repeated every other day. The time, start date, end date, and duration of these appointments remain consistent with the others.