Appearance
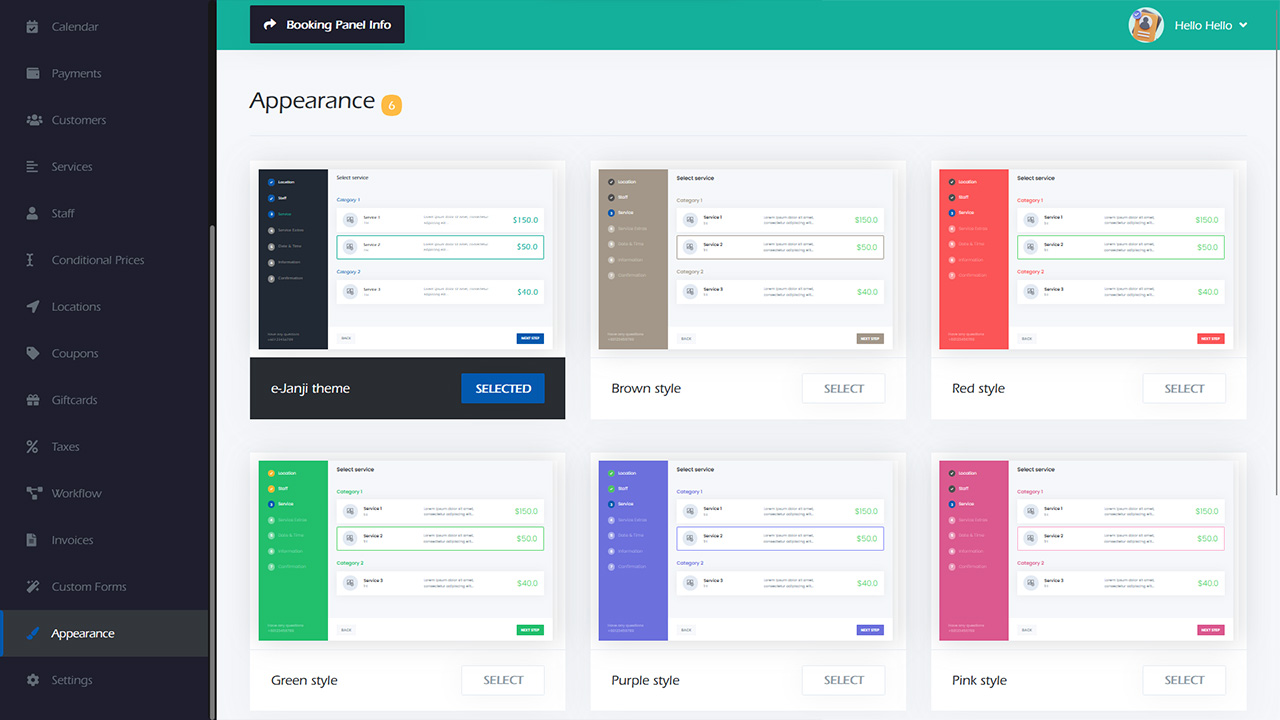
The front-end booking panel can be customized to align with your business colors in a manner that best suits your preferences. There are six distinct styles to choose from, namely e-Janji theme, Brown, Red, Green, Purple, and Pink. You have the flexibility to select any of these styles or even create a completely new template from the ground up. To modify the appearance of the panel, simply click on the CHOOSE button located in front of the panel.
To incorporate a style that is not currently accessible, simply select the option to create a new style by clicking on the designated box below. This will enable you to introduce a distinctive and personalized style to your preferences.
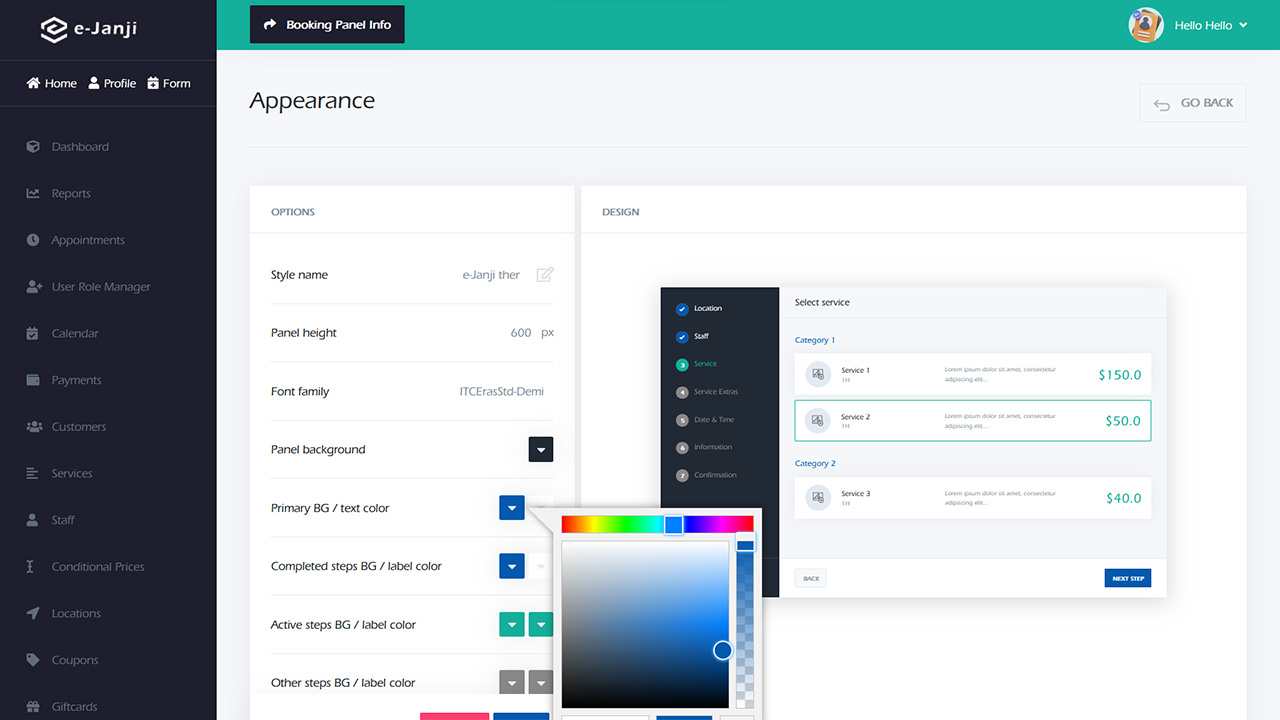
The popup panel will display the default colors initially. To customize the appearance, assign a name to the style and modify the relevant colors. The changes made will be reflected on the right side of the panel, allowing for easy and convenient creation of the desired style.
After configuring the colors, users will have the capability to generate a unique style by simply selecting the SAVE button. Subsequently, the style can be located within the list and accessed by clicking on the CHOSE button. Additionally, users have the option to edit styles by selecting the desired style from the list.
In order to remove a style, locate the style within the list and proceed to click on it. Within the Edit panel, navigate to the bottom and click on the DELETE button to effectively eliminate the style. However, it is important to note that the selected style cannot be directly deleted. Therefore, it is necessary to modify the style beforehand and then attempt to delete it once again.