Zoom
Zoom is a crucial tool for businesses of all sizes who want to ensure smooth communication and uninterrupted productivity. By utilizing the Zoom integration, teams can easily schedule meetings with clients directly on the platform. Integrating Zoom into your Appointment Booking system eliminates the hassle of coordinating and organizing meetings across various platforms, making the process more streamlined and convenient in one central location.
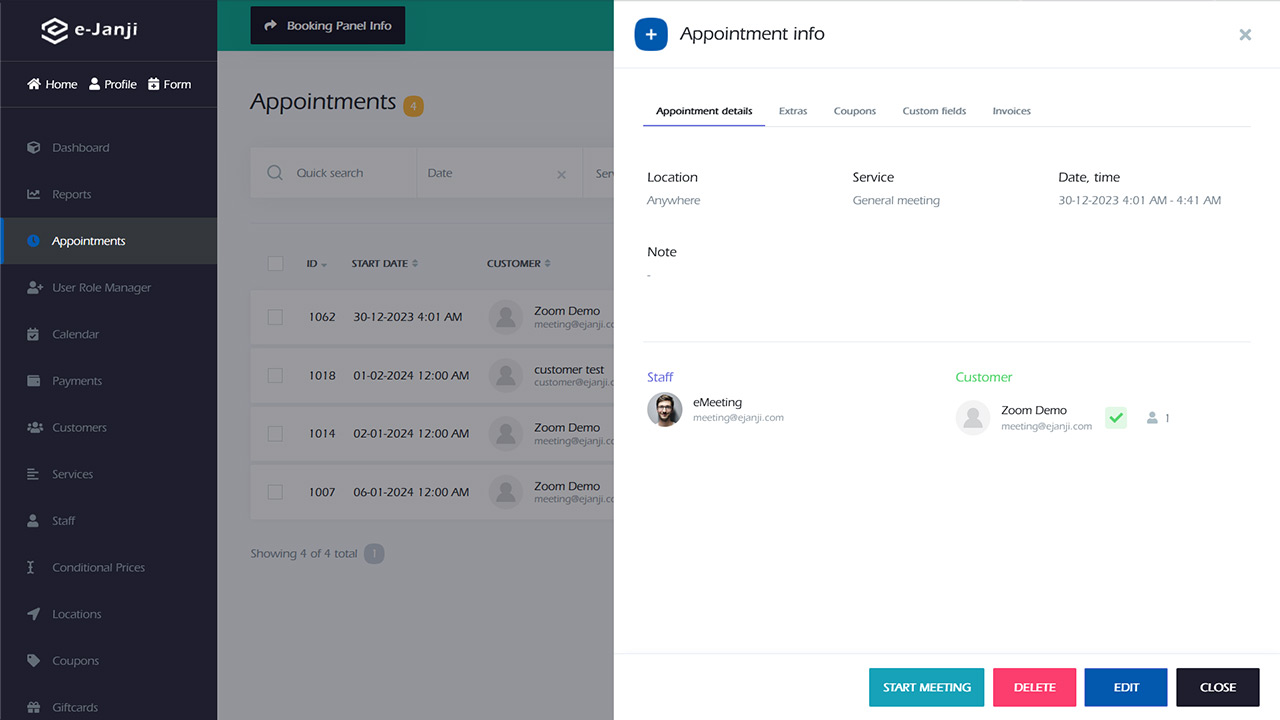
Once the booking is confirmed, the API automatically generates a scheduled Zoom meeting, enabling you to effortlessly share the meeting URL with clients, staff, and administrators through the Workflow module. This streamlined approach eliminates the necessity for manual intervention and effectively automates the entire process. Joining Zoom meetings is a straightforward task, as customers and staff members can conveniently access the relevant meeting from their respective panels by simply accepting the Zoom meeting link provided in the notifications. Moreover, the Staff admin panel conveniently features a “Start Meeting” button for easy access.
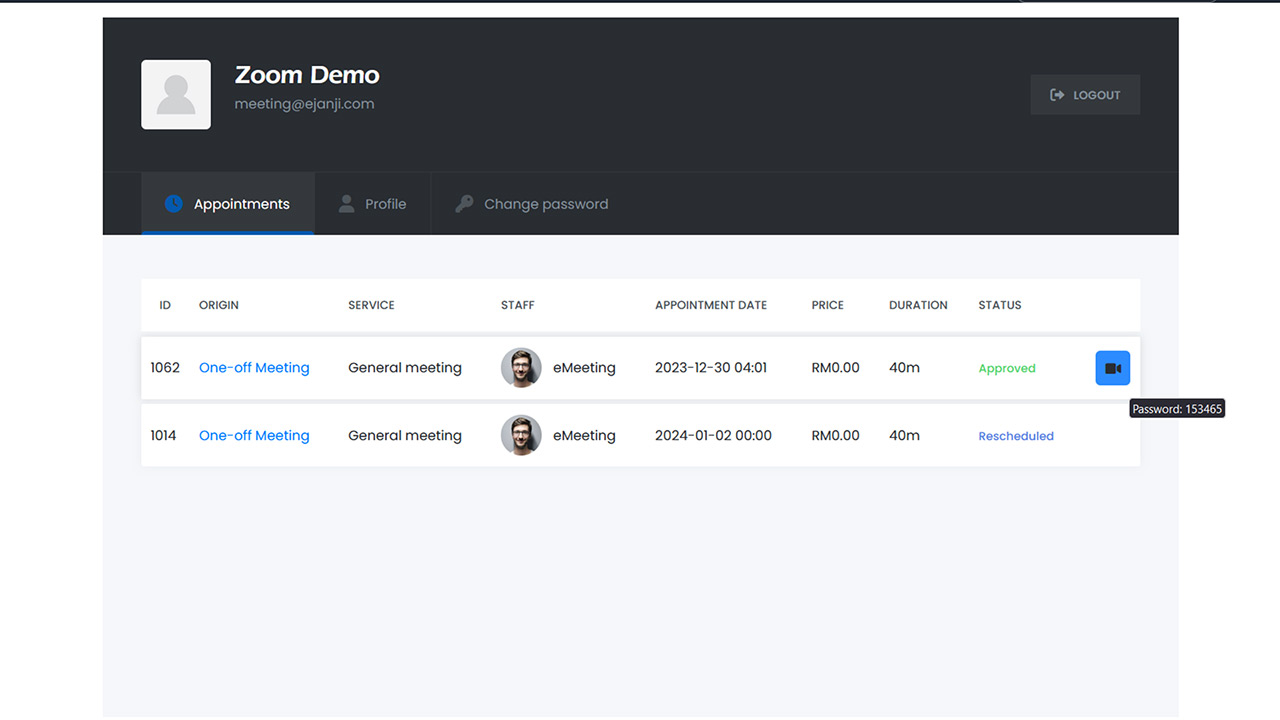
Additionally, the Front-end Customer Dashboard also serves as a platform for users to interact with the system.
You can assign separate Zoom accounts to each member of your team, making it possible to see the meetings of each team member on the Zoom dashboard. Furthermore, you can choose to add each team member as a User in Zoom and then connect these added Users to specific staff profiles.
It is worth noting that the integration of Zoom with e-Janji is completely synchronized. This means that if an appointment is rescheduled through e-Janji, the corresponding meeting on Zoom will also be rescheduled automatically. Similarly, if an appointment is removed from e-Janji, the corresponding meeting on Zoom will also be deleted automatically.
By utilizing our comprehensive set of keywords, you can enhance your Zoom meetings with even more valuable information. These keywords are specifically designed to seamlessly integrate with Zoom, providing you with a wealth of useful data to enrich your meetings. Take advantage of this powerful tool to elevate your Zoom experience and make the most out of your meetings.
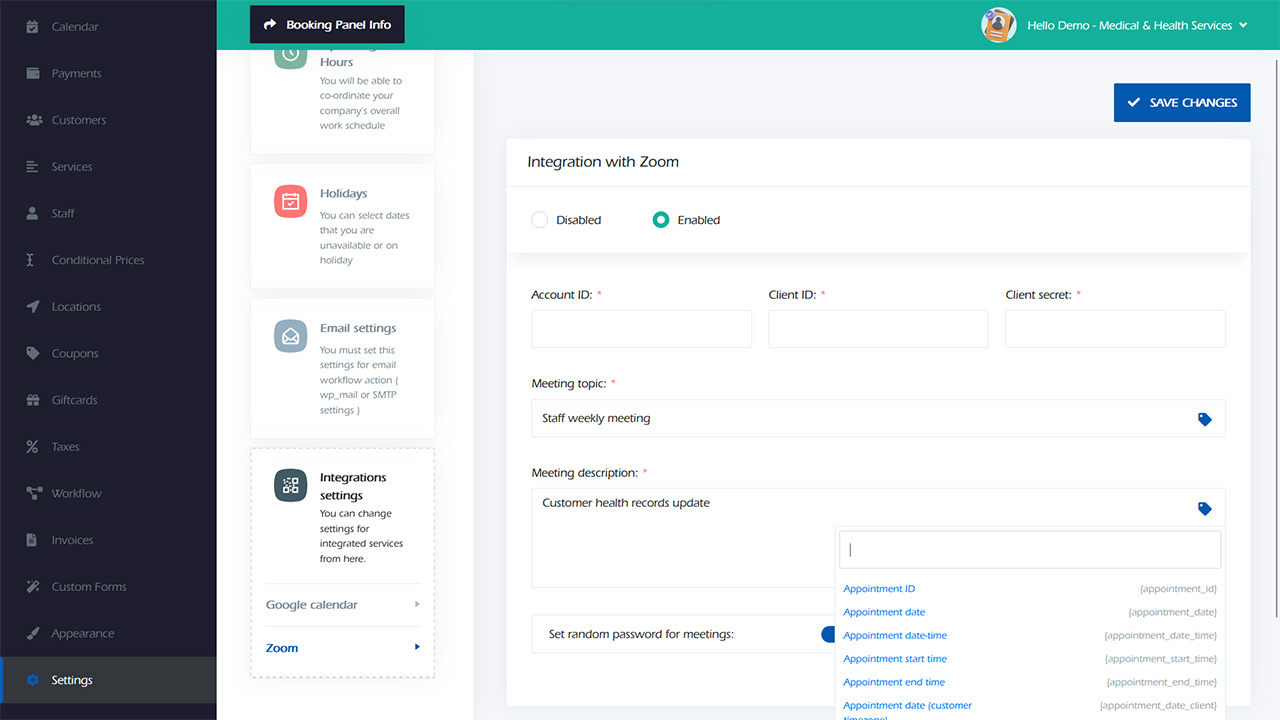
Configuring Zoom integration is a straightforward process that can be easily accomplished. To successfully integrate Zoom with e-Janji, you can follow the steps provided below.
To obtain the Zoom Account ID, Client ID, and Client Secret, you can follow these steps:
1. Visit the Zoom App Marketplace Developer Portal at https://marketplace.zoom.us/develop.
2. Log in with your Zoom account credentials or create a new account if you don’t have one.
3. Once logged in, click on “Build App” in the top right corner.
4. Choose the app type you want to create (OAuth or Chatbot) and click on “Create” next to the selected type.
5. Fill in the required information for your app, including the name, description, and logo.
6. In the “App Credentials” section, you will find your Client ID and Client Secret. Take note of these values for future reference.
7. To find your Zoom Account ID, go to the “App Credentials” section and click on the “View” button next to “Credentials Information.”
8. On the next page, you will find your Zoom Account ID listed under the “Account ID” field.
Please note that the process may vary slightly depending on any updates or changes made to the Zoom Developer Portal. It’s always a good idea to refer to the official Zoom documentation for the most up-to-date instructions.