Customers
The database stores all the data of your clients, which can be exported to an excel file at any time. Additionally, you can import new customers from a CSV file using the import function. In case you prefer to add a new customer manually, you can access the Customers menu and click on the ADD NEW button.
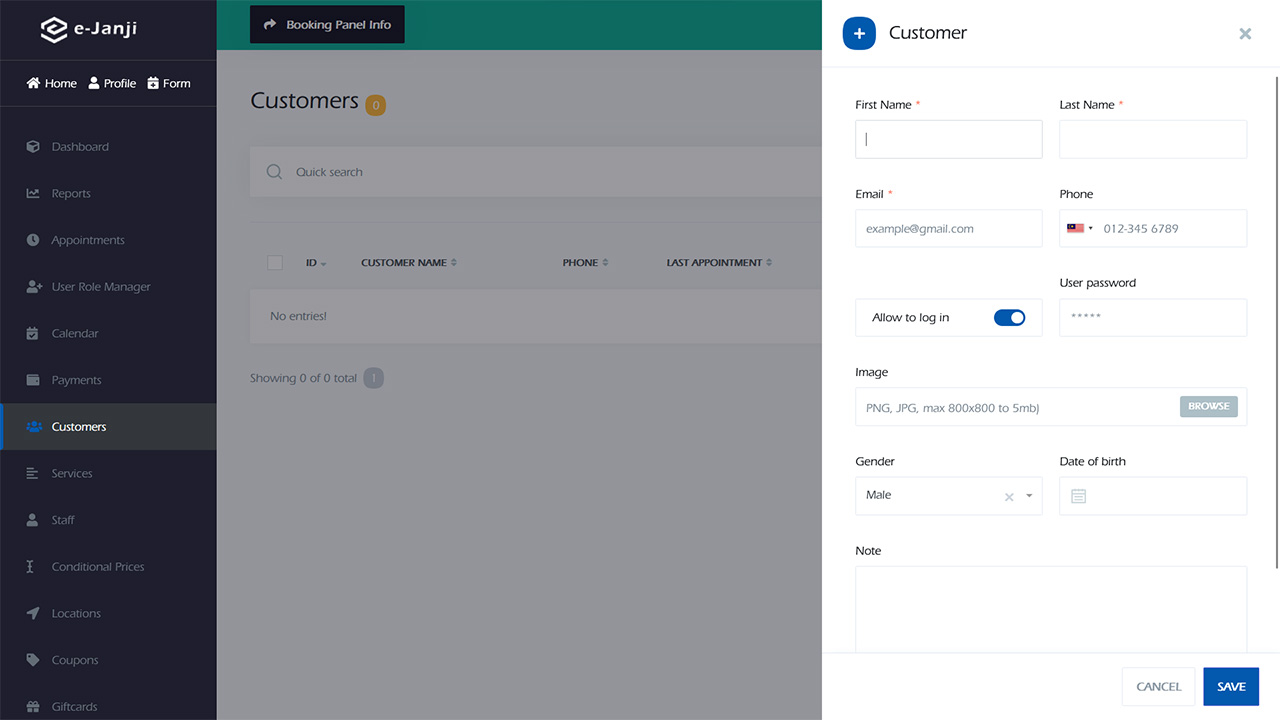
To complete the customer’s profile, enter their full name, email address, phone number, and upload a profile picture. Additionally, provide their gender and date of birth. Once all the required information is filled in, you can proceed to add the customer to the list by clicking on the SAVE button.
The toolbar offers a practical and easily navigable interface that enables users to search for customer information based on various criteria such as name, surname, phone number, and email. Additionally, it provides the option to sort the displayed list in either ascending (ASC) or descending (DESC) order based on the selected column.
The “Allow to login” functionality enables the creation of user accounts for customers, granting them the ability to independently manage their appointments through the Customer Dashboard.
To remove a customer from the system, navigate to the corresponding options located in close proximity to the customer’s information and proceed to select the Delete button. In order to modify customers’ data, access the options adjacent to the customer’s details and select the Edit button. Additionally, it is possible to delete multiple customers simultaneously by selecting the desired customers and utilizing the delete button located at the bottom of the interface.
Customer registration
The process of customer registration occurs when a customer schedules their initial appointment on your website. Upon making their first appointment, a customer profile is established, and a password is automatically generated and transmitted to the customer through a notification.